42/52: Braised Short Rib, Stout and Potato Potpies

Quite possibly my favorite thing about fall is comfort food. I love slow cooking a meal all day, and then digging in all cozied up inside when it’s chilly outside! This meal encompasses all that and more! It really reminds me of my trip to London. My favorite pub meal was steak & ale pie… ohhhh man. What I wouldn’t give for a steak & ale pie from The Eagle and Child in Oxford, England again! {If my laptop hadn’t crashed I would show you a lovely picture of said delicious steak & ale pie!} It was this neat little pub our professor told us about. It is only a few blocks from Oxford University. It is acclaimed for housing famous literary geniuses such as J.R.R. Tolkein and C.S. Lewis… such a fun little place! Anyway… this recipe is delicious and definitely a keeper for the winter.

**Quick substitution note… the recipe calls for boneless short ribs. We couldn’t find any nearby so we opted for stew meat which worked wonderfully. The key is having a cut of meat with some marbelization, you need the fat to make this recipe everything it is! We also couldn’t find cipollini onions, so we substituted shallots. Also — the recipe calls for 6 medium potatoes. I would hesitate slicing all of these until you need them. The amount you need will depend on the serving dishes you use.

Yumm! Serve with peas and dinner rolls for a yummy english inspired dinner!
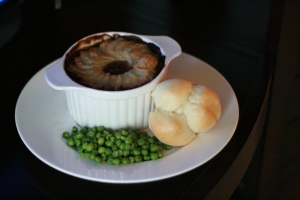
Braised Short Rib, Stout and Potato Potpies

Ingredients:

For the filling:

4 lbs boneless short ribs, cut into 2-inch pieces
Course salt and freshly ground pepper
1/3 cup all-purpose flour
3 T safflower oil
1 medium yellow onion, halved and thinly sliced
5 garlic gloves, thinly sliced
2 bottles {2 ounces} stout, preferably Guinness {3 cups}
2 rosemary sprigs
1 lb cipollini onions, peeled

For the topping:

6 medium russet potatoes {3 1/2 lbs}
Extra-virgin olive oil, for brushing
Course salt and freshly ground pepper

Directions:

1. Make the filling: Preheat oven to 300 degrees. Season short ribs with salt and pepper. Dredge the short ribs in flour, coating all sides. Transfer to a large plate. Heat oil in a large dutch oven in batches, brown short ribs, about 1 minute per side. Transfer to a large plate using kitchen tongs.

2. Reduce heat to medium. Add yellow onion to dutch oven and cook until golden, about 8 minutes. Add garlic. Cook for 2 minutes. Return meat to dutch oven. Add stout and rosemary. Bring to a simmer. Cover and transfer to oven. Bake for 2 1/2 hours.

3. Remove dutch oven from oven and add cipollini onions. Braise until meat is tender and onions are cooked through, about 30 minutes. Shred meat using 2 forks. Season with salt and pepper. Divide filling among eight mini {1 cup} pie plates, or transfer to a 12 inch {8 cup} gratin dish.

4. Make the topping: Raise the oven temperature to 375 degrees. Peel potatoes, and very thinly slice each {preferably on a mandolin}. Arrange potatoes over meat to form tight concentric circles, working around the edge and overlapping each potato by three-quarters. Brush with oil and sprinkle with salt and pepper. Bake until topping is golden and filling is bubbling, about 45 minutes for mini potpies {1 hour for large potpie}.

Source & Recipe: Martha Stewart Living – October 2011 Issue

I also made some yummy dinner rolls to go with the potpies. I absolutely love dinner rolls and feel that there are some meals that are incomplete without them! Since I was running short on time when I decided to make them, I opted to go for my fall back recipe — the Kitchenaid Sixty-Minute rolls! Yes. They really only take 60 minutes from the time you combine ingredients until they’re coming out of the oven. Including rise time! Love, love, love this recipe.

Kitchenaid Sixty-Minute Rolls

Ingredients:

4-5 cups flour
3 T sugar
1 tsp salt
2 – 1/4 ounce packages quick rising yeast
1 cup milk
1/2 cup water
1/4 cup butter
*optional: additional melted butter for brushing on top of baked rolls

Directions:

1. Combine 3 1/2 cups flour, sugar, salt and undissolved yeast in bowl.

2. Attach bowl and dough hook. Turn to speed 2 and mix for 1 minute.

3. Combine milk, water and margarine in a saucepan. Heat over low heat, until liquids are very warm (120 to 130). Margarine does not need to melt.

4. Turn to speed 2 and gradually add liquid to flour mixture, about 30 seconds. Mix 1 minute longer. Continue on speed 2, adding remaining flour, 1/2 cup at a time, as needed. Mix until dough clings to hook, about 5 minutes.

5. Knead dough on speed 2 for 7-10 minutes longer, or until dough is smooth and elastic. Stop.

6. Place in greased bowl, turning to grease top. Cover, let rise in a warm place 15 minutes.

7. Turn dough out onto floured board. Divide in half and shape as desired. Cover; let rise in slightly warm oven {about 90 degrees} for 15 minutes or until doubled in bulk {usually 15 minutes works just fine!}. **My note: I usually make “clover leaf” dinner rolls. Using a pizza cutter, cut dough in half. Cut one half of dough into 6 pieces. Cut each of the 6 pieces into 3 more pieces. Form the 3 pieces into balls and place all 3 balls in one cup in your muffin tin. Repeat until you have 24 dinner rolls.**

8. Bake at 425, for 12 minutes, or until nice and brown. Remove from baking sheets and cool on wire racks.

Source & Recipe: Food.com

Enjoy!

31/52: Chocolate-Dipped Coconut Macaroons with Patrina

Last month I introduced my new baking project — Long Distance Baking! {See tab at the top of the blog} To refresh your memory, the gist of the project is…My Aunt who lives in Colorado and I will alternate choosing baking projects each month, bake them on the same weekend and share pictures and thoughts about the recipes! Last month my Aunt chose Homemade Hostess Cupcakes. I would venture to say they are even better than the real thing! This month was my turn to choose the recipe.

I have tried to take over a new leaf lately, mostly to get ready and anticipate the lack of time that I will have come fall due to my full schedule of full-time graduate school and my internship in the elementary school. That concept combined with my hubby’s recent love of coconut macaroons and the desire to cross off another item on my Kitchen Bucket List led me to choose Chocolate-Dipped Coconut Macaroons to bake this month! We had some yummy coconut macaroons while in Vegas back in June, but I have loved coconut macaroons ever since I studied abroad in England and France during J-term 2008. I’m not sure that I had ever had a real macaroon until then. They were so chewy and delicious — an instant favorite.

Speaking of… That trip was ridiculously amazing. I have always had a thing for studying World War II. Probably because my grandfather served in the Navy as a fighter pilot over the Pacific during the war. I should make a post just about his story one of these days, it’s unbelievable. Anyway, when the opportunity came up to study World War II in England and France I wanted to go with everything in me. I had never left the country before. Thanks to my amazing mother it became a reality. I will never forget the experiences of seeing the impact the war had on London, and England as a whole or the experience of walking the beaches of Normandy and seeing the battle field where so many of our men lost their lives on D-Day. Or, walking through the bunkers the Germans used {which still hold the guns they used}, or the many beaches where so many of our men fought for not only our freedom but that of the world, or walking through the American gravesite paying tribute to the soldiers… the memories are ones that I cannot truly put into words but they were most certainly life changing. I only have a few pictures from my travels because sadly the hard drive of my laptop crashed and I cannot find the backup CD. 😦 Nonetheless, here are a few pics from the trip to England and France! Good and emotional times.

On the Thames River & Boardwalk


 Oxford – Christ’s Church {parts of HP were filmed here}

Stonehenge — so windy and cold!


Point du Hoc, Normandy, France — to the West of Omaha Beach

Me on Gold Beach {taking a picture of the mulberry}

Anyway… on with the macaroons. Sorry for that tangent! As I was saying while I was over in England/France I had amazing coconut macaroons and pain au chocolat {OH MY GOODNESS}. To this day I have not been able to find anything that is even comparable at bakeries or stores. So I’m not really sure why it took me so long to want to re-create the macaroons, but alas a lightbulb went off and I started the search for the perfect recipe. I was still apprehensive because I had this perfect ideal in my head of what these macaroons should taste like. And to my present surprise {and my Aunt’s too} this recipe did not disappoint! These macaroons are so easy; they are so good you would think they took hours to make. I will be making these again very soon because we have already devoured the recipe I made less than a week ago!! You need to make these and when you do I’d love to hear what you all think? Be sure to let me know if you think they are as good as I do once you give them a try!!

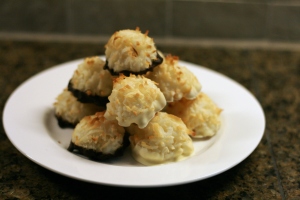
Chocolate-Dipped Coconut Macaroons

Ingredients:

1 14-ounce package sweetened shredded coconut (about 5 cups)
4 large egg whites
2/3 C sugar
1/3 C All-purpose flour, spooned and leveled
1/4 tsp kosher salt
1/2 tsp pure vanilla extract
Approximately 6 ounces bittersweet chocolate or white chocolate {or both!}, melted {use double broiler method} and cooled to room temperature

Directions:

1. Heat oven to 325° F.

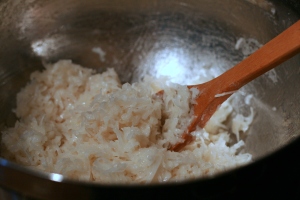
2. In a medium bowl, combine the coconut, egg whites, sugar, flour, salt, and vanilla.

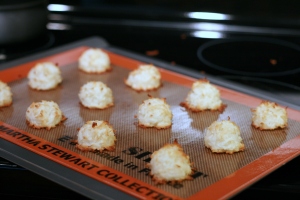
3. Drop packed tablespoonfuls of the mixture onto parchment-lined baking sheets, spacing them 1 inch apart. {I used my cookie dough scoop, and it worked wonderfully but you could also just used a regular tablespoon}

4. Bake, rotating the baking sheets halfway through, until lightly golden, 25 to 30 minutes. Cool slightly on the baking sheets, then transfer to wire racks to cool completely.

5. When cool, dip the bottom of each macaroon in the chocolate and place on a parchment-lined baking sheet. Refrigerate until firm, 20 to 30 minutes. Store the macaroons in an airtight container at room temperature for up to 7 days – if they last that long!


{Tip: My condo tends to run warm all year round, so I chose to keep mine in the fridge so the chocolate wouldn’t melt once firmed — if your chocolate starts melting, store them in the fridge in the same airtight container.}

Source & Recipe:
Real Simple

Happy Friday! I hope y’all enjoy your weekend!