Happy birthday… to me!

Wow. It has been months. I mean, months, since I’ve posted! It even feels weird to be typing this up!

Quick catch up… I got my first teaching job! I graduated last June, and was hired in August to be a half day Kindergarten teacher. MAN. Half day Kinder is tough. But, at the same time it is rewarding and fun! And because of the craziness, it is safe to say that my life has been taken over! All I do is teach, plan for teaching, organize for teaching, talk about teaching. I LOVE IT! And, I have an amazing husband who is supportive and listens as I ramble on, and on about my days. However, life is good!

The other day I was reading up on a friend’s blog. She is blogging to keep family and friends in communication about her pregnancy. She made my bagels recipe, and shared it on her blog. I realized how long it has truly been since I blogged and how much I enjoy it! So, here I am! It was perfect timing because… today… is… my… birthday!! Yes. I am 27 today. Weird. And, I was already planning on baking up some birthday happiness, so it was a perfect time to share with you all!! {If anyone is still even subscribed/reading my blog that is! ;)}

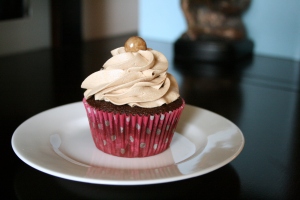
For my birthday I couldn’t choose between a lemon cupcake with lemon curd filling, or a mocha inspired cupcake. Alas, the chocolate and coffee lover in me won!

I thought it was fitting that I take a pic to mark my enthusiasm to get back into blogging… CHEESE!

IMG_8482

Yep. 27 year old cheesy smile. It still feels weird to say I’m 27. :-\

Anyhow – these cupcakes were fun to make. I must admit I wasn’t thrilled with the texture, and they weren’t chocolaty enough for my tastes, but all in all they are good! The frosting is smooth and airy and delicious! The frosting is definitely a remake!

IMG_8509

Yummm. These will be delish tonight for a birthday treat.

IMG_8510

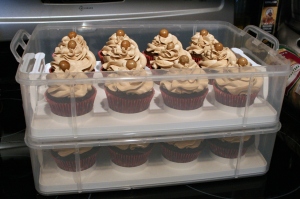
Eeek. All my cute little cupcake soldiers lined up! Ready to be devoured!

ONTO the recipe!!!

Mocha Cupcakes

Ingredients:

For the cupcakes:

  • 1/2 cup butter, softened
  • 1 1/2 cup sugar
  • 2 eggs
  • 1 1/2 cup flour
  • 1/2 cup unsweetened dark cocoa powder
  • 1/2 tsp kosher salt
  • 1 tsp baking soda
  • 2 Tbsp espresso powder
  • 1/2 tsp baking powder
  • 1/2 cup brewed coffee, cooled
  • 1/2 cup buttermilk

For the frosting:

  • 1 cup butter, softened
  • 1 Tbsp espresso powder
  • 1/4 cup heavy cream
  • 1 Tbsp chocolate syrup
  • 5 cup powdered sugar

Directions:

For the cupcakes:

  1. In a bowl, mix flour, cocoa, salt, baking soda, baking powder and espresso powder. Set aside.
  2. In a measuring cup, mix together cooled coffee and buttermilk. Set aside.
  3. In large mixing bowl, beat butter and sugar together until fluffy, about 5 minutes.
  4. Add eggs, beating in one at a time.
  5. Slowly add in dry ingredients, alternating with milk mixture {about 3 additions of each}.
  6. Pour batter into cupcake liners, no more than half full {seriously – the rise up fast, and don’t dome over like most cupcakes… don’t over fill!}
  7. Bake in a 350 degree oven for 15-20 minutes. Remove and cool completely.

For the frosting:

  1. For the frosting, warm cream for about 30 seconds in microwave. Whisk in espresso powder and chocolate syrup. Set aside {I threw mine into the freeze for 5-10 minutes to cool down the mixture, so as to not melt my thick airy frosting!}.
  2. Beat butter, powdered sugar together, until fluffy. About 3-5 minutes.
  3. Add cooled cream & espresso mixture slowly until desired consistency. If desired, whip an additional 3-5 minutes until fluffy.
  4. Pipe frosting onto cooled cupcakes and garnish with chocolate covered espresso bean, or in my case a chocolate covered nut or chocolate ball {Chocolate covered espresso beans are non-existent where I live!}.

Source & Recipe {very slightly adapted} from: Shugary Sweets

I hope y’all have a great weekend and a safe St. Patty’s!! 🙂

CIAO!

xoxo

High Protein Cheesecake


Regardless of how hard I try, I am a dessert girl. One of my biggest challenges in my striving to eat healthy, is to curb my cravings for dessert. I am sure that most of you ladies know what that is like! Especially around “that” time of the month. So, whenever I find a recipe which makes dessert a semi-healthy choice, I am all in! 🙂

When reading “The New Rules of Lifting for Women”, one of the things I loved about the nutrition plans is they acknowledge that the majority of women are hard-wired to want/crave dessert! The meal plan even factors in dessert! Yaaa-hoo! That was one of the selling points for me {tee hee}.

One of the recipes in the book is high protein cheesecake. I was immediately curious! Especially since the cheesecake does not have a crust. I wondered how it would stay together when you served it? But I did love the fact that it had added protein aside from the protein found in the ricotta cheese and eggs. So, the other day I gave it a whirl and baked some up!

Verdict? Pleasantly surprised!! Of course, it isn’t the same as “real” cheesecake. The texture isn’t as creamy as real cheesecake, but that also makes up for the lack on crust on the bottom. It doesn’t dish up very easily since there isn’t a crust. But if it satisfies a dessert craving, does it really matter how pretty it looks?! The flavor is delicious, and when topped with fresh fruit, like blueberries, it is a special {and healthy!} treat!!

Tip: Be careful to not over cook. The recipe says to bake between 30 and 40 minutes. I chose to bake for 35, and forgot to check it around 30 minutes. Result? The outside got a little done. It was still good, but the center was creamier!

Cheesecake with fresh blueberries?! Yes please!

High Protein Cheesecake

Serves 8; approximately 190 calories per serving.

Ingredients:

  • 2 cups part-skim ricotta cheese
  • 2 medium eggs {I used large and it turned out fine}
  • 1/2 cup reduced-fat sour cream
  • 1/2 cup vanilla whey-protein powder {I recommend Optimum Nutrition, Vanilla Ice Cream}
  • 1/4 cup granulated stevia
  • Grated rind and juice of 1 fresh lemon
  • 1 tsp. vanilla extract

Directions:

  1. Preheat oven to 375 degrees. Spray a 9-inch pie pan with cooking spray and set aside.
  2. Put all ingredients in blender, and process until very smooth.
  3. Pour mixture into prepared pan.
  4. Place pan on the top rack of oven and place a flat pan of water on bottom rack. Bake 30 to 40 minutes. {Center will still jiggle slightly}. Allow to cool to room temperature on a cooling rack. Chill well prior to serving.

Source & Recipe: slightly adapted from The New Rules of Lifting for Women.


If you give this recipe a try, let me know what you think! Ciao!


Friday Favorite and Key Lime Pie!

Friday Favorite: Muffin Topless! 

I love surfing Pinterest and the internet for motivation and inspiration to keep moving toward my fitness and health goals. Recently I ran across an amazing blog, and it is chock full of everything! Inspirational pictures, motivating quotes, recipes, music playlists, etc!! The best part? She is a real person who came to the realization that she needed to live her life in a more healthy way. I love reading about success stories! It inspires me. Check it out! {That is her in the picture… pretty darn cool}.

Eating healthy and staying on track is, well… HARD! If you’ve been following me since the beginning of my blog, I am a foodie at heart and love to try new and tasty things. So finding new recipes that are healthy and still tasty has been quite a journey. However, I am in the school of thought that even if you are eating healthy, you still need to treat yourself to stay on the band wagon. I know myself too well and if I know I can’t have a dessert for weeks on end, I’m likely to end up falling off the band wagon and ruining all the hard work I put in! “Treat days” are like the light at the end of the tunnel! 🙂

So this week, rather than a healthy recipe, I bring you a treat recipe! I had been craving key lime pie for weeks, and so I finally gave in {Against my better judgement} and made a pie. For treat days, I’ve been trying to indulge in things that are small, and won’t have anything left over {less temptation} but I couldn’t resist this time! And, I must say, I was pretty happy! However, I was less happy when it came time to get rid of the rest of the pie sitting in my fridge so I wouldn’t eat it! Haha.

Disclaimers:  {1}: I chose to use regular limes versus key limes. I got to the grocery store with every intention of using key limes, but what I didn’t realize is they are the size of a walnut. OMG, I could not imagine squeezing enough of those to get ONE CUP of juice. There was just no way. Even without the key limes, the pie was still delicious, so pick your poison! {2}: Also, another variable in this recipe is the crust. Some folks like a thick crust and some don’t. I like mine in between. I followed Emeril’s recipe, but there was too much graham cracker mix for my liking, so adjust as necessary! {3}: I adjusted baking times for the crust and also for the filling due to researching online.

Haha, forgive my lack of skill with serving pie. Inevitably I always end up breaking the crust!

Key Lime Pie

Ingredients:

  • 1 1/2 cups graham cracker crumbs
  • 1/2 cup granulated sugar
  • 4 tablespoons {1/2 stick butter} melted
  • 2 {14-ounce} cans sweetened condensed milk
  • 1 cup key lime or regular lime juice
  • 2 whole eggs
  • Heavy cream
  • Powdered sugar {approximately 1/2 c}
  • 1/2-1 tsp vanilla

Directions:

  1. Preheat the oven to 375 degrees F.
  2. In a bowl, mix the graham cracker crumbs, sugar, and butter with your hands. Press the mixture firmly into a 9-inch pie pan, and bake until lightly brown, about 5-10 minutes. Remove from the oven and allow to cool to room temperature before filling.
  3. Lower the oven temperature to 325 degrees F.
  4. In a separate bowl, combine the condensed milk, lime juice, and eggs. Whisk until well blended and place the filling in the cooled pie shell. Bake in the oven for 15 minutes and allow to chill in the refrigerator for at least 2 hours.
  5. Before serving, make whipped cream for the top. Blend heavy cream on high until it begins to thicken, then add powdered sugar and vanilla to taste, and whip until stiff. Top chilled pie slices with a dollop of whipped cream and enjoy!

Source & Recipe slightly adapted from: Emeril

Happy Friday! I hope you enjoy your weekend! 🙂

Chocolate and Honey Banana Mini Cupcakes with Honey Cream Cheese Frosting

Spring breaaaaaak! 🙂 This week is spring break for my school district.

I feel like a little kid again! Wooooo!

Except for the fact that I won’t be going anywhere nice and tropical. I will be at home in rainy Seattle, and working the entire week! LOL. I still have a ton of work to do for my university and will be working pretty much straight through today and tomorrow between planning, and mini work sessions. BUT, I am still stoked about how much I got done this weekend, and how much at ease I feel for this week. It was perfect timing after completing my student teaching last week! I am one step closer to completing the program and getting my residency certification! Can I get a “whoop whoop”?! 🙂

So, I’m not sure what is up with our condo, but it seems to be perfect for over ripening bananas! I no sooner get my bananas home and they are turning spotty. No joke! Sometimes even within a day or two, even if I bring them home slightly green. Anyway, I get tired of repurposing the inedible bananas in the form of banana bread or muffins. My husband suggested banana cupcakes this time! I found this recipe and it is great. I loved the idea of a banana cupcake, I feel that it at least makes it a little healthier. {A girl can dream, right?} And the frosting?! OH the frosting. DELISH.

The only strange thing is that it was very thin, almost too thin to pipe even after refrigerating for an hour! I would suggest adding some additional cream cheese and butter, or omitting part of the honey and/or vanilla, to keep from thinning out too much. But if you don’t care how they look, follow as is, the frosting is to die for!

Chocolate and Honey Banana Mini Cupcakes with Honey Cream Cheese Frosting

Ingredients:

For the cupcakes:

  • 2 cups all-purpose flour
  • ¾ tsp baking soda
  • ¼ tsp baking powder
  • ½ tsp salt
  • 1 cup banana puree, mashed with a fork (about 2 large or 3 small overripe bananas)
  • ½ cup buttermilk, at room temperature
  • 1 ½ tsp pure vanilla extract
  • 1 stick unsalted butter, at room temperature
  • ½ cup granulated sugar
  • ¼ cup packed light brown sugar
  • ¼ cup honey
  • 2 large eggs, at room temperature
  • 3 oz bittersweet chocolate, coarsely grated

For the frosting:

  • 9 tbsp (1 stick + 1 tbsp) unsalted butter, at room temperature
  • 12 oz cream cheese, at room temperature
  • ¼ cup + 2 tbsp packed light brown sugar
  • ¼ cup + 2 tbsp honey
  • 1 scant tsp pure vanilla extract

Directions:

  1. Center an oven rack and preheat the oven to 350F. Line cupcake tins with mini cupcake liners.
  2. In a medium bowl, whisk together the whole wheat flour, all-purpose flour, baking soda, baking powder, and salt. Set aside.
  3. In another bowl or measuring cup, combine the banana puree, buttermilk, and vanilla extract. Set aside.
  4. In a large bowl, beat the butter with an electric mixer for a few seconds, until creamy. Gradually add the sugars and beat until light and fluffy, about 5 minutes. Beat in the honey and continue mixing for another 2 or 3 minutes. With the mixer on medium, add the eggs, one at a time, beating well after each. Reduce the speed to low and add the dry ingredients in three additions alternating with the banana mixture, starting and ending with the dry ingredients. Scrape the bowl as necessary, and beat only enough to incorporate the ingredients after each addition. With the mixer on low speed, mix in the grated chocolate just until combined.
  5. Fill cupcake liners about 3/4 full with batter. I like to use a cookie scoop, this seems to be about the perfect amount.
  6. Bake the cupcakes for about 15-18 minutes, until the cupcakes are puffed, and a toothpick inserted comes out clean. Another way to test this is to tap the top of the cupcake, if it feels springy, its ready to come out!

Make the frosting:

  1. In a small bowl, using electric beaters, beat the butter until smooth and creamy. Set aside.
  2. In another bowl, using the same beaters (no need to wash them) beat the cream cheese with the light brown sugar until light, creamy, and completely lump-free. Beat in the honey and vanilla extract. Stop the mixer and scrape the sides of the bowl as needed. Beat in the creamed butter just until the ingredients are combined, should take less than a minute. Transfer the frosting into a piping bag fitted with a large star tip and pipe a rosette over the top of each cupcake. Refrigerate to firm up the frosting a bit, for about 20 minutes or so.
  3. The cupcakes can be made a day in advance and kept in the refrigerator in an air-tight container. Remove the cupcakes from the fridge 30 minutes prior the serving time.

Source & recipe {very} slightly adapted from: Baking Obsession

Yum! I hope you enjoy!

By the way, if you haven’t already, be sure to head on over to my official Facebook page! {Santies Sunnyside Up} I have quite the little science experiment going on in my kitchen. For a sneak peek, head on over to the Facebook page, and click “like”!!

Best wishes for a fabulous week!

Ciao!

Birthday mission: Creamsicle Cupcakes!

Today is my birthday! Woo hoo! 🙂

I have done tons of research the past few weeks to find the *perfect* birthday treat. I decided a while ago that I need a tropical vacation, life is so busy right now I want to scream at times, and our weather is disgusting! So, I figured, what better way to get a vacation than through a dreamy cupcake?! 😉 I was torn between these creamsicle cupcakes and a pina colada cupcake. I fell in love with this creamsicle cupcake because it is filled with a creamy vanilla mousse. It sounded so good!

And you know what?

IT IS.

🙂

Well, off to birthday dinner. Enjoy the cupcakes!

Creamsicle Cupcakes

Cupcake Ingredients:

  • 1/2 cup unsalted butter, room temperature
  • 2/3 cup granulated white sugar
  • 3 large eggs, best if not refrigerator cold
  • 1 1/2 teaspoon pure vanilla extract
  • 1 1/2 teaspoon of pure orange extract
  • 1 1/2 cups all purpose flour
  • 1 1/2 teaspoons baking powder
  • 1/4 teaspoon salt
  • 1/4 cup milk, best if not refrigerator cold

Vanilla Mousse Filling Ingredients:

  • 1 cup milk
  • 1 cup heavy cream
  • 1 (4 serving) package vanilla Instant Pudding Mix (not Cook & Serve)

Orange Cream Cheese Frosting Ingredients:

  • 1 8-ounce package of cream cheese, room temperature
  • 1/2 cup (1 stick) butter, room temperature
  • 1/2 teaspoon clear vanilla extract
  • 1 teaspoon orange extract
  • 4 cups confectioners’ sugar
  • orange sprinkles or sanding sugar, if desired

Directions:
*Note: This recipe makes twice as much mousse as you need for filling the cupcakes. If you want to use half the pudding pack and save the rest for later, just measure it out and do so. Or use the extra mousse for another project (you know, like eating it with a spoon).

  1. Make cupcakes: Line two muffin tins with paper liners. Preheat oven to 350°F. In a small bowl, whisk together the flour, baking powder, and salt. In a separate, medium bowl, cream butter and sugar together until light, fluffy, and pale yellow. Add the eggs in one at a time, beating after each, and then beat in the vanilla and orange extract. Add the dry ingredients in, alternating with the milk, in three additions. Begin and end by adding the dry ingredients. Scrape down the sides of the bowl periodically.
    Fill the paper liners about 2/3 full of batter and bake cupcakes for 15-20 minutes or until a toothpick inserted into the center comes out with just a few moist crumbs. Remove cupcakes from the oven and let cool completely.
  2. Make mousse: To make the vanilla mousse, combine milk, cream, and pudding mix in a medium bowl. Beat with a mixer until you reach soft peaks, or a thick whipped cream consistency (this takes a few minutes). Refrigerate mousse until you’re ready to use it.
  3. Make frosting: To make the frosting, cream butter and cream cheese together until fluffy in a large bowl. Add extracts and mix. Add sugar gradually, mixing as you go, and then beat the frosting until smooth and creamy. Cover the bowl with a damp cloth until ready to use.
  4. Assemble cupcakes:  To fill the cupcakes, use the Cone Method: cut an upside-down cone out of the top of each one. Cut off the tip of the cone (and eat it, if you wish) leaving just the “lid.” Fill the cavity with mousse using a piping bag or zip-top bag with the corner cut off, and then replace the “lid” to give you a relatively smooth surface to frost. Use a piping bag or zip-top bag to pipe on the frosting. Sprinkle on orange sanding sugar, if desired.

Source & Recipe: Willow Bird Baking, originally adapted from My Baking Addiction

Reader beware: It’s a doozy!

Disclaimer: Wow! I had this post written and nearly ready for posting, back in JANUARY! Eek. I’m not sure what happened, but I have decided it is time to revise and post this bad boy. So sit back, grab a mug of coffee and get ready for some giggles! 🙂 

The title says it all. This post is chock full of craziness! Such is my life as of lately. I am full force into phasing into my student teaching. I spend all day, every day with my little kiddos and I love them to death! Last week was quite the week however, and I had every intention of writing about it in the middle of the week and of course, things got too hectic. The reason this week was a doozy has to do with the wide array of situations I was exposed to and handled this past week! I dealt with blood, snot, poo and vomit – all within 4 hours! I am pretty sure that is record, unless you’re a parent, then of course it might be a daily occurrence. 😉 If you’re interested to find out the story behind these bodily fluid stories, keep reading. Otherwise, scroll down to the best part of this post… the goodies I baked today!

It was a doozy of a day…

Before beginning my story it is important to understand that I have begun ‘phasing in’, which means I am slowly taking over subjects throughout the day so I will be nearly full time by the time February begins. That being said, I am teaching the entire morning now. So rewind to Wednesday. We had just finished our reading block, and were all nestled together doing our little math calendar routine when all of a sudden a hand goes up and I hear a Mrs. Santie!! {Which generally drives me nuts, because the kids always yell my name, I’ve been working diligently to teach them patience!} Its my little sweetie, “MY NOSE IS BLEEDING!!!” And was it ever, I no sooner got tissues to her and the blood was gushing out of her nose. I freaked! I haven’t even had a bloody nose myself, and I was unsure of school procedures for such a situation, so I sent one of my kiddos to find my mentor teacher. She wasn’t in the hallway like I thought she was – so my little guy begins pounding on the shared room to get the attention of one of our para-educators! {Think Mervyn’s “Open, open” commercials!}

The funny part is that if he had run back into our classroom, the door is always unlocked in there! Haha. Long story short, my little kiddo was okay and I learned procedure for bloody noses. It was fairly comical.
Everything seemed to be back to normal after lunch. We did our math lesson, and got through our math quizzes. The kids worked so hard. It was great! We transitioned into our Daily 5 time {Which is essentially like the Silent Sustained Reading {SSR} time we had as kids}, the kids grabbed their school boxes and found their reading spots. All was good. Their time was up so we were gathering back on the carpet to evaluate their success and the kids started freaking out… “EWWWW it stinks!”, “It smells like fart!!” I tried calming the kids down but geez, it really did stink and it wasn’t going away!

Fast forward… we had finished Daily 5 were now lining up for recess and another one of our kiddos had a break down and started arguing with mentor teacher, he started crying and his whole face was covered, I mean COVERED with snot. So I stayed back and calmed him down. We walked out to recess and the kids were all playing nicely. After recess it was time for P.E., we all lined up, and guess what? It still stinks! Just about then, my teacher noticed a strange mark on one of our kiddos pants. She approached him, “Did you have an accident?”, he absolutely denied it as he was backing up into a bush to cover his bottom!  Long story short — the smell at carpet?! He pooed his pants! Oh my goodness, it was sooo bad. I felt horrible for him, and for everyone who had to enter our classroom!! We sent him to the nurse and then headed up to check on him. After talking with the office staff, we checked our mailbox and headed back into the hall where we noticed a second grader running down the stairs, when all of a sudden… vomit. Oh geez… all I could think was “Really?!” and then, “Oh no! Damage control time!” Our little kinders were walking out to second recess, I had to guide them around the vomit and get them to walk outside, they were like deer in a headlight, couldn’t get over what they were seeing!

Needless to say, it was a doozy of a day!

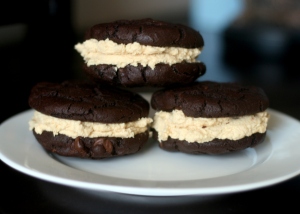
Kind of like my treats I made yesterday. I think we all know that I love chocolate and peanut butter. You can’t go wrong there! This is a doozy of a delicious combination!

Double Chocolate Espresso Sandwich Cookies with Peanut Butter Buttercream

Double Chocolate Espresso Sandwich Cookies

Ingredients:

1 cup flour
3/4 cup dutch processed cocoa powder
1 tsp baking soda
1/4 tsp salt
8 T unsalted butter, softened
2/3 cup granulated sugar
¼ cup firmly packed brown sugar
1 large egg
1/2 tsp vanilla extract
¾ cup chocolate chips
1 tsp instant espresso powder

Directions:

1. Whisk together the flour, cocoa powder, baking soda, salt and espresso powder. Set aside.
2. In another bowl, cream together the butter and both sugars. Stir in the egg and vanilla.
3. Gradually mix in the flour mixture to the wet mixture, until just incorporated. Stir in the chocolate chips.
4. Separate the dough into two and roll them into 2 uniform logs about 12 inches long. Refrigerate it until firm enough to slice.
5. Preheat the oven to 350 degrees.
6. Cut the logs into 1 inch slices and place 1 ½ inches apart on the prepared sheets. Bake for 15 minutes, or until the dough looks just baked. The cookies should be tender, so do not over bake. {Note: watch these closely! I was chit-chatting with a friend and not paying attention. My cookies turned out crispy. Take out a little earlier than your judgement tells you!}

Peanut Butter Buttercream

Ingredients:

2 1/2 c powdered sugar
1/2 c creamy peanut butter
1/2 tsp vanilla
2-3 T milk

Directions:

1. Cream together butter and peanut butter.
2. Add vanilla, mix until creamy and combined.
3. Slowly add powdered sugar until incorporated.
4. Add milk and then whip until creamy. Frosting should be slightly thick.

Source & Recipe: Lovin’ From the Oven, originally from Jules Food

Cheers! Hope y’all have a fabulous weekend!! 🙂

52/52: Homemade Bagels

Do you notice anything special about this post title?! That’s right! 52/52! I have completed my goal. If you can’t remember, my very first blog post talked about my personal goal to post the equivalent of one post a week for the entire year. I have been blogging and creating cheesy little websites since I was really young {I was an 11 year old geek who taught herself the basics of html}. And well, believe it or not, I made it! Some weeks I posted twice, and sometimes I posted extra, quick, fun things… but regardless, I have completed my goal! I am so excited and proud of myself.

Oh yeah! 🙂

So, to celebrate my goal completion I thought it was only proper to also accomplish a baking goal, and check another item off my kitchen bucketlist! I have been wanting to make bagels for so long. I don’t know about you, but I absolutely love these little carb keepers! The thought of fresh, homemade bagels has always danced in my head. Over the years I have seen many recipes but this recipe seemed to easy, and too good to be true. And, well, I think it was! It was oober simple, took less than 2 hours and the result is pretty darn yummy. My bagels are a little funny shaped due to some silly mistakes on my part when boiling {I had a very difficult time getting them out of the water}, but they still taste yum!

Here are a few pics…

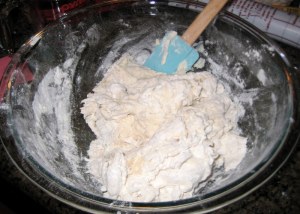
During…

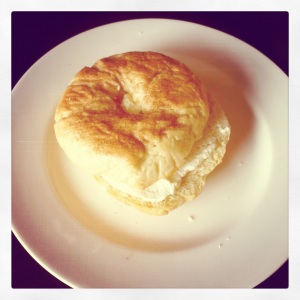
After… {Plain, cinnamon & sugar and cheese!}

YUM!

Here’s how ya get the job done…

Homemade Bagels

Ingredients:

4 cups bread flour
1 T sugar
1 1/2 tsp salt
1 T vegetable oil
2 tsp instant yeast
1 1/4 – 1 1/2 cups of warm water

Directions:

1. Mix all of the ingredients in a bowl. The dough should feel stiff, but if you can’t get all the flour incorporated add the extra bit of water.


2. Knead the dough for about 10 minutes, or until uniform and smooth.


3. Cut the dough into 8 equal sized balls and rest for 10-20 minutes {A pizza cutter works great here}.


4. Pre-heat the oven to 425 degrees.
5. Now, we roll the dough into bagel shape, and there are several ways to do this. My favorite is to roll the dough back into a ball and poke through the center. This opens the dough and you can tug the round of dough into the shape of a bagel {This is how I did it, it was fun!}. OR Roll the dough into a little snake on the counter that is longer than the width of your two hands, then wrap it around your dominant rolling hand. Wrap the dough rope around your hand and squish the overlapping ends together.
6. Let the bagels-to-be rest on the counter for 20 minutes, grease a large baking tray {Or line with parchment}, and bring a pot of water to boil.

7. After the bagels have rested they will begin to look puffy and are ready to be boiled. Boil the bagels for a minute on each side, then let them dry out for a minute or two before placing them on the baking tray. Repeat until all the bagels are boiled.


8. Bake the bagels for 10 minutes, flip the bagels over, and bake for another 10 minutes… and Wah-LAH! Perfection. {Note: I baked bagels on the first side, flipped and then topped with the goodies! Think cheeses, cinnamon & sugar, sesame seeds, everything bagel seasons… endless possibilities. To add cinnamon & sugar, spray top with water first!}
9. Let the bagels cool for at least 20 minutes before eating them.

Source & Recipe: Life According to… Talia Christine

So simple. Love. In retrospect I should have rolled and smoothed out my little dough balls before letting them rest. I think that is why they’re so bumpy. But hey, it gives them character, right?! I have also read elsewhere if you boil for a little longer than 1 minute on each side that they will become chewier. I might try that next time. Although, the recipe I am DYING to try is this cinnamon raisin one from Annie’s Eats!

Well folks, thanks to everyone who has managed to stick with me and read my blog this year. I am feeling good about keeping this blog going, although posts might become much more sporadic with my taking over the classroom very soon! Hope you all have a fun and safe New Years. Speaking of, off to finish up hubby’s birthday dessert – Sour Cream Lemon Pie! He is a New Year’s Eve baby, so we’ll be celebrating tomorrow.

Until next time… Ciao!

44/52: Homemade Halloween Oreo Cookies with Patrina

Good morning and Happy Halloween!

I felt it was only appropriate to end the month with something festive and of course with my October baking project! My aunt and I both decided to take a month off in September because of the craziness of school for me, and her as well {I don’t know how she does it with 4 kids, 3 being teens/tweens!}. So here we are with our October goody… homemade oreos! Who doesn’t love an oreo? I don’t think it is one of those goodies I could eat all the time, but I definitely have my spurts where oreos just hit the spot. Overall these were yummy! The cookie is crisp, but so much better than the store-bought version. The filling was pretty good, but I think they would have been just as good with a regular frosting in the middle – but then again, I guess they wouldn’t be homemade oreo cookies then?!

These are super fun Halloween treats. I think I’m going to put together some treat bags for my MAE cohort today — we have long days with double classes tonight. Eeek. We could probably all use the sugar rush!

Homemade Oreo Cookies

Ingredients:
For the cookies:

1 1/4 cups all-purpose flour
1/2 cup unsweetened or Dutch process cocoa powder
1 tsp baking soda
1/4 tsp baking powder
1/4 tsp salt
1 to 1 1/2 cups sugar {Use 1 cup for a truer-to-original Oreo wafer or more sugar for a sweeter chocolate cookie}
10 tbsp {1 stick + 2 tbsp} unsalted butter, at room temperature
1 large egg

For the cream filling {white}:

4 tbsp {1/2 stick} unsalted butter, at room temperature
1/4 cup vegetable shortening
2 cups confectioners’ sugar, sifted
2 tsp vanilla extract

Instructions:

  1. Preheat the oven to 375˚ F.  Line two baking sheets with silicone baking mats or parchment paper.
  2. In a food processor or the bowl of an electric mixer, combine the flour, cocoa powder, baking soda, baking powder, salt, and sugar.  Mix briefly to combine.  Add the butter to the bowl and pulse or mix briefly to incorporate.  Add in the egg and mix until the dough forms a cohesive mass.
  3. Scoop between 2 tsp to a scant tbsp of batter {depending on how large you want them} onto the baking sheet.  Continue scooping, spacing the dough balls a couple of inches apart.  With moistened fingers, gently press down on the dough balls to flatten slightly.  Bake for 9-11 minutes {closer to 9 minutes for smaller cookies}, rotating the pans halfway through baking.  Transfer the baking sheets to a wire rack and let cool completely until the cookies are firm and set.  Be sure the cookies are completely cooled before filling.
  4. To make the filling, combine the butter and shortening in the bowl of an electric mixer.  Beat on medium-high speed until smooth.  Add the confectioners’ sugar to the bowl and mix on low speed just until incorporated, then increase the speed to medium-high and beat until light and fluffy, about 2-3 minutes.  Blend in the vanilla extract.
  5. To assemble the cookies, pair them up by size.  Use a pastry bag fitted with a plain round tip to pipe a swirl of filling onto the flat side of one cookie of each pair.  Sandwich together with the remaining cookie and press down so that the filling reaches the edges.

Yield: 20 to 30 sandwich cookies, depending on the size

Source & Recipe: Smells Like Home

Anyway, I hope everyone has a safe and happy holiday…. what are your Halloween plans?! Did you do anything fun this weekend? Have a great week everyone!

43/52: Pumpkin Cheesecake

Wow — weekly post number 43. I can’t believe there are less than 10 weeks left in the year. Time flies! But, at least it is the best part of the year – holiday time! I look forward to this part of the year all… well, year! I enjoy spring and summer, but there is nothing like holiday baking! Fun, fun! Speaking of holiday baking, ever since I made my pumpkin cupcakes I have been craving more pumpkin goodies! We bought pumpkin spice coffee creamer at the store recently, but it didn’t subside my craving. I think the real reason why is because I’ve had my eye on this pumpkin cheesecake for weeks. Once I showed my husband the picture he agreed, we needed to try this recipe!

I am soo glad we did. It was delicious! The texture was so creamy, and the flavor reminded me of a wonderful cross between velvety cheesecake and pumpkin pie. Oh my. We only had one piece each at home, and then I packaged up a few pieces for my father and mother-in-law and the rest went to work with John. There is no way I could have the rest sitting around the house! The reviews at work and by my father-in-law were unanimous – delicious! My father-in-law even said it might be the best cheesecake he has ever had. 🙂

Unfortunately my pictures aren’t my best. We didn’t cut into the cheesecake until after dinner, which was a bad move on my part! Why? No natural light. 😦 It was already dark out. So rather than being patient and trying to find a good spot to photograph the cheesecake, I was impatient and ready to eat! Regardless, I think y’all get the point. Its delicious! Especially topped with just a little drizzle of caramel. 😉

Yumm!

Pumpkin Cheesecake

Prep time: 20 minutes | Bake time: 55 to 65 minutes

Ingredients:

For the crust:
2 c gingersnap cookie crumbs {about a 14-oz package of cookies}
2 T light brown sugar
Pinch of salt
6 T unsalted butter, melted

For the cheesecake:
32 oz cream cheese, at room temperature
3/4 c granulated sugar
1/2 c light brown sugar
2 cups {about a 15-oz can} canned pumpkin  {**I prefer Libbys}
4 eggs, at room temperature
2 1/2 T heavy cream
1 T vanilla extract
1 1/2 tsp ground cinnamon
1/2 tsp ground ginger
1/2 tsp salt
1/4 tsp ground nutmeg
1/4 tsp ground cloves
1/4 tsp ground allspice

Directions:

1. Preheat the oven to 350 degrees F. Double-wrap the bottom and outside of a 9-inch springform pan with heavy-duty foil. Mix together the crust ingredients and press into the bottom of the springform pan. Bake for 6 to 8 minutes, or until lightly browned. Remove from oven and cool completely. Reduce oven temperature to 325 degrees F.

2. Bring a pot of water to a boil for a water bath.

3. Beat together the cream cheese and the sugars on medium speed until smooth and creamy, scraping the sides of the bowl as needed, about 3 minutes. Add the pumpkin and mix on low until completely incorporated. Add the eggs one at a time, beating well until fully incorporated and scraping down the sides of the bowl between each addition. Add the heavy cream and vanilla and beat until well combined, about 1 minute. Add the cinnamon, ginger, salt, nutmeg, cloves and allspice and mix on low to incorporate.

4. Pour the batter into the prepared crust. Tap the pan on the counter to release any air bubbles. Place the pan into a larger pan {a roasting pan is great for this} and pour the boiling water into the larger pan until it is about halfway up the springform pan. {**Note: I didn’t have a pan big enough for a water bath — if you don’t, get one! My perfectly baked cheesecake cracked when I took it out of the oven 😦 }

5. Bake for 55 to 65 minutes, or until the edges are set, but the middle still jiggles a little. Keeping the oven door closed, turn off the oven and let the cheesecake rest in the oven for 1 hour. After 1 hour, remove the cheesecake from the oven, carefully remove it from the water bath, remove the foil and place the cheesecake on a wire rack to cool completely, about an additional 2 hours. Once completely cool, refrigerate for at least 6 hours {preferably overnight}.

6. Cover any leftover cheesecake with plastic wrap and store in the refrigerator for up to 4 days. Wrapped, the cheesecake can be frozen for up to 2 months.

Source & Recipe: Brown Eyed Baker

Make me! This would be perfect for a Halloween or harvest celebration – or even for Thanksgiving. Either way, give it a try – it is so worth it!

41/52: Spiced Pumpkin Cupcakes

I am so excited to share my first autumn recipe with you all! I am welcoming autumn with open arms this year. I am so excited for fall flavors and colorful leaves. And my puppy’s first birthday! Yes – I’m that puppy parent… I am pretty sure you will be seeing a “birthday” post in the very near future. His birthday is October 22! Speaking of my little ball of hair, he was just oh so cute yesterday. I was photographing my cupcakes for this blog entry and my little dude was just being so cute, I couldn’t resist a mini photo shoot. He is such a good sport – he totally poses for me. 🙂

And then, once I was uploading the pictures, I couldn’t help but make a super cute collage with the photos, and then I couldn’t help setting it as my desktop.

See?! I told you. I am totally that puppy parent. Haha. On to the cupcakes!

I have been chomping at the bit to make my first fall recipe. But, life has been crazy and there hasn’t been much time for baking. The other night I didn’t really have any homework that was due the next day and my husband was craving something home-baked. My first thought?! These cupcakes. Oh my gosh. I made these last year and posted them on the blog I was working on at that time. And actually, as I think about it, this was the very first recipe I made in my Kitchenaid standup mixer. They were absolutely amazing last year and equally as amazing this year. I will *NEVER* search for another pumpkin cupcake recipe for as long as I live, that is how good this recipe is! And so simple! Love, love, love. Moist, slightly spicy and pumpkin-ey… perfection!

The only change I made was to the frosting, it was too thin and I wanted it just slightly sweeter.

Spiced Pumpkin Cupcakes

Ingredients:

For the cupcakes:

2 2/3 cups all-purpose flour
2 tsp. baking soda
2 tsp. baking powder
2 tsp. ground cinnamon
¼ tsp. freshly grated nutmeg
¼ tsp. ground cloves
1 tsp. salt
1 (15 oz.) can pumpkin puree
1 cup sugar
1 cup packed light brown sugar
1 cup canola or vegetable oil
4 large eggs

For the frosting:

8 oz. cream cheese
5 tbsp. unsalted butter, at room temperature
2 tsp. vanilla extract
3
½ cups confectioners’ sugar, sifted

Directions:

To make the cupcakes, preheat the oven to 350°F.  Line cupcake pans with paper liners.  In a medium bowl, sift together the flour, baking soda, baking powder, cinnamon, nutmeg, cloves and salt.  Set aside.  In the bowl of an electric mixer, blend together the pumpkin, granulated sugar, brown sugar and oil. Add the eggs one at a time, beating well after each addition.  With the mixture on low-speed, add the flour mixture in two additions, mixing just until incorporated.

Fill the cupcake liners about three-quarters full.  Bake until the cupcakes are golden and a toothpick inserted into the center comes out clean, 18-20 minutes.  Transfer the pans to a wire rack and let cool for 10 minutes, then remove the cupcakes from the pans and let cool completely.

To make the frosting, combine the cream cheese and butter in the bowl of an electric mixer.  Beat on medium-high speed until well combined and smooth, about 2-3 minutes.  Mix in the vanilla extract.  Gradually beat in the confectioners’ sugar until totally incorporated, increase the speed and then beat until smooth. Frost cooled cupcakes as desired.

Source and Recipe: Annie’s Eats, originally Williams Sonoma, Frosting slightly adapted from Confections of a Foodie Bride

Seriously… try these. If I could figure out how to duplicate this recipe for any cupcake flavor I would do it, that is how moist and delicious these are! Plus, look at how cute they are. I love opening my fridge and seeing these cuties.